Take a Photo Like DSLR From Mobile.

Before you spend money on a DSLR and lens for product photography, consider using the quality camera that you carry around with you all the time: your smartphone!
You may be thinking that using your smartphone for product photography sounds a bit crazy, but with today’s advances in technology, it’s absolutely feasible to create great product images by utilizing your smartphone’s advanced camera features and a tripod. This option is both budget- and user-friendly—not to mention convenient! In this post you will learn how to use your Smartphone to capture high quality product images.For the purposes of this guide we’ve focused on features in the default camera apps for the latest versions of iOS and stock Android. If you’re not running stock Android, you should find most of these tips still apply, and if you want to you can download the stock camera app from Google.
Third Party Camera Apps
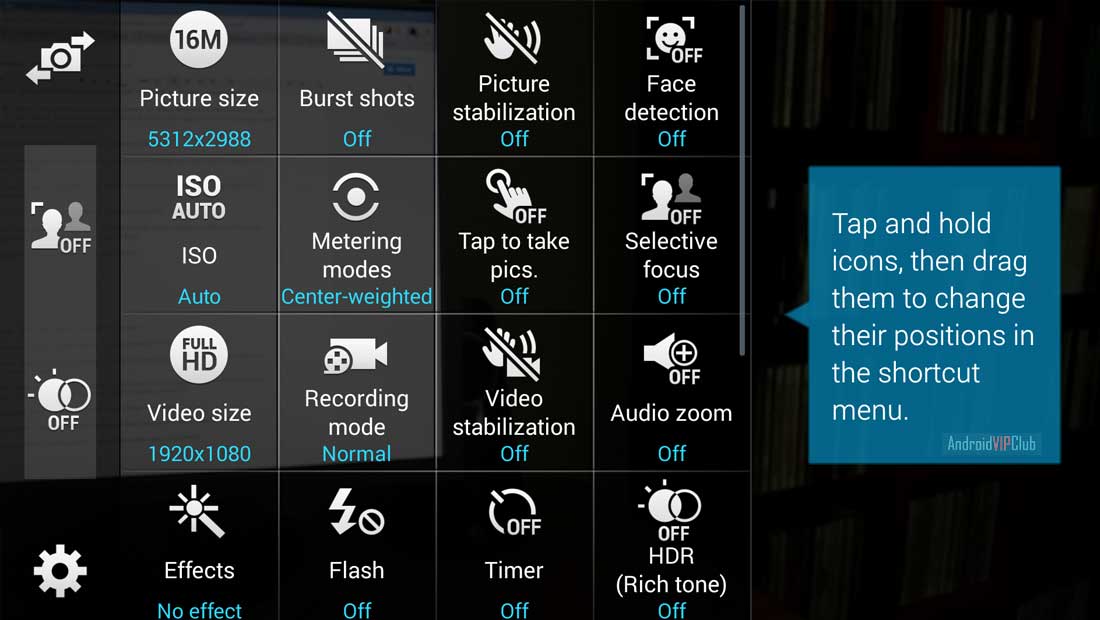
Your phone’s default camera app may not have all the features required for optimizing photos. A third party camera app may allow you to use additional features to make the most out of your smartphone’s camera.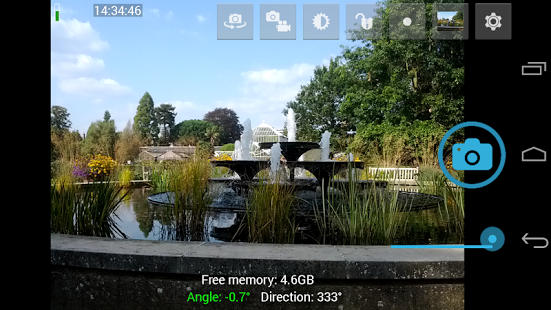
Apps like Open Camera (Android) and Camera+ (iOS) offer expanded functionality over your default camera app and can be handy to make use of the tips mentioned earlier for improving your photography skills.
Download Open Camera on Google Playstore here.
There are more camera apps out there (each with their unique pros and cons). So keep trying them out until you find the one that fits your needs perfectly.
Image Stabilization

For the best possible results, we recommend using a tripod. Here are a few great options that can be used on basically any smartphone:
Choosing The Right Apps
There are a plethora of camera shooting & editing applications for your smartphone, so how do you decide? One thing to remember is that apps have been designed to help you to use your smartphone to its full potential. We recommend that you start by consulting professional app reviews about which apps are the best. Apps even win awards based on these reviews for being so great!Below are a few apps that have received stellar reviews:
1. Shooting
For shooting, we recommend that you first try to use the default camera app that comes already installed on your smartphone. If you aren’t getting the results that you want, then it’s time to try another application. Here are a few suggestions:
This Android-specific app has been rated #1 in camera apps for Android phones. If you’re looking for a shooting application with a few more features than the default camera app, then try Camera Zoom FX to help boost your images to the next level.
$2 iPhone Camera+
Camera+ is an iPhone-specific application that has been rated #1 in camera apps for iPhones. Using this application will allow you to harness your smartphone’s advanced shooting capabilities. The photos included in this tutorial were taken using this app.

2. Editing
Free Adobe Photoshop Express
Adobe Photoshop Express is a free image editing application for both Android and iPhone smartphones. This quick and easy app might be all that you need in your post processing workflow.

$9 Photoshop Touch
Photoshop Touch is an editing app with more bells and whistles than the free “Express” version. It’s a great editing app that replicates the desktop version of Photoshop while still remaining user-friendly. The Touch program has much more functionality than the Express version.
Adjust the camera settings.
Now that you’ve properly adjusted your application settings, it’s
time to work on changing the camera’s manual exposure settings to
capture the best light within your frame.


The settings circled with red are the ones we recommend adjusting.
Zoom: Pull the zoom slider at the top of the screen
to adjust the frame around your product. Make sure that all of the
product fits inside the frame and make sure to leave enough room on all
sides so that you can crop the image if necessary in post processing.
White Balance: To properly set the white balance according to the light temperature in your setup, touch the WB button and then touch the white background.
Exposure: Touch the circular Exposure button and then touch your product so that the camera knows to properly expose the product.
Focus: Touch the circular Focus button and then touch your product so that the camera knows to properly focus on the product.
LOCK: When you are finished adjusting each of these
settings, make sure to tap each one again to lock the settings in place.
This will keep the camera from auto-adjusting the settings while you
are taking images.
Take a look at your image and see if you think that it needs to be
brightened or darkened in order to achieve a proper exposure. If you
think that the exposure needs tweaking, touch the +/- button below the
circular Focus button and pull the slider up or down to change the
exposure. Our exposure needed to be brightened. We began with the screen
on the left and used the exposure slider to brighten the image several
stops to create the screen on the right.
by sujeet kumar

It wan a wonderful content Sujeet Kumar. I really appreciate that and
I have some suggestions. Here is a blog - Photo editing & photography tips.
This may help you to find something useful